RDP over ZTNA
ここでは、Windowsホスト (Windows 10 Pro) に対し、リモートからCloudflare Zero Trust Networkを経由し、安全にRDP接続を確立するための手順を紹介します。
なお、サーバーやパソコン等の組織のインフラをCloudflare Zero Trust Networkに接続するには、Cloudflareグローバルネットワークのエッジサーバーにトンネルを張るためのデーモンが必要です。
-
cloudflare daemonのダウンロード
デーモン「cloudflared」をWindows 10 Proにダウンロードします。
新しいディレクトリ(フォルダ)を作成し、
ダウンロードした.exeファイルを移動します。
以降はPowerShell等のCLIツールを「管理者として実行」して作業を行います。
なお、この記事におけるファイル名はダウンロードしたままの名前「cloudflared-windows-amd64.exe」ですが「cloudflared.exe」等に変更しても問題ありません。
-
サービスのインストール
作成したディレクトリに移動し、
以下のコマンドを実行し、サービス「cloudflared」をインストールします。cloudflared-windows-amd64.exeに代わり、任意の場所から「cloudflared」コマンドによる各種実行が可能になります。
PS C:\Cloudflared\bin> .\cloudflared-windows-amd64.exe service install
2023-05-01T10:05:31Z INF Installing cloudflared Windows service
2023-05-01T10:05:31Z INF cloudflared agent service is installed windowsServiceName=Cloudflared
2023-05-01T10:05:31Z INF Agent service for cloudflared installed successfully windowsServiceName=Cloudflared
-
組織のZero Trustと連結
新しい別のディレクトリを作成しておきます。
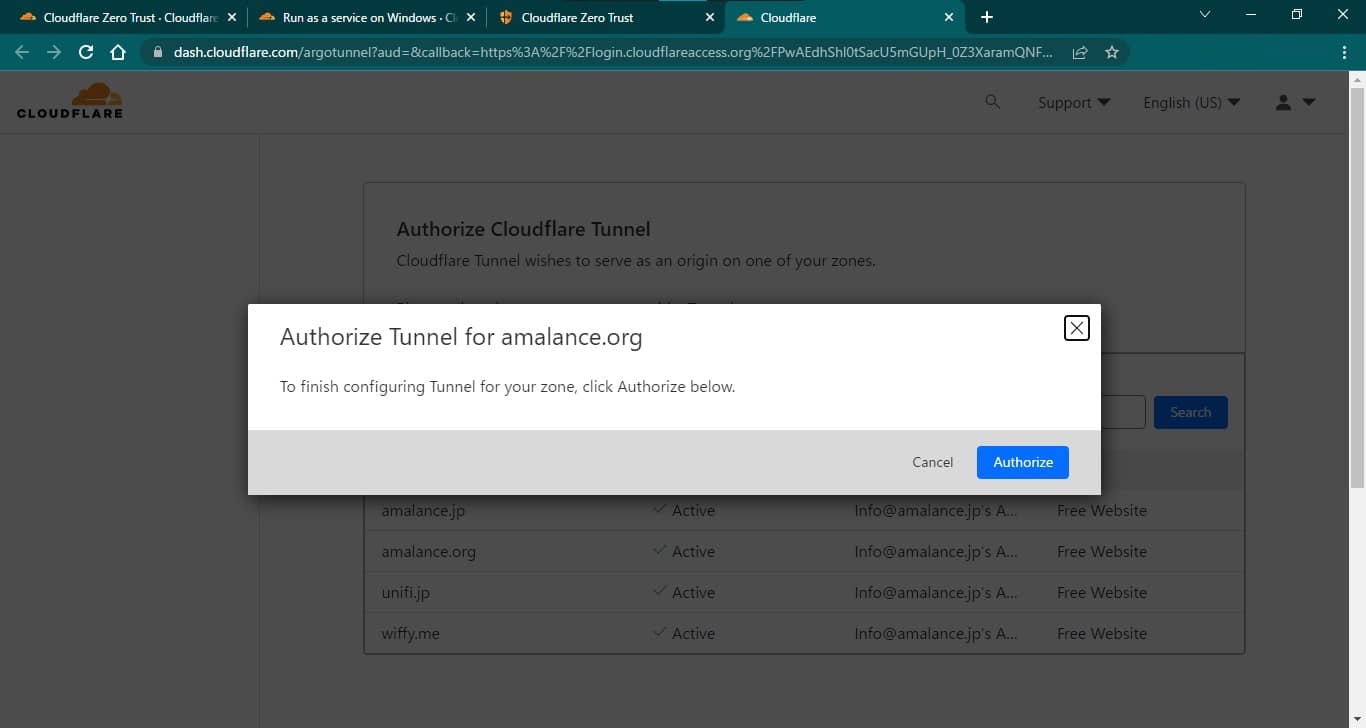
組織のZero Trustダッシュボードにログインします。以下のコマンドを実行するとWebブラウザが起動し認証要求されるので、このホストを所属させる組織のドメイン名を選択し「Authorize」をクリックします。
ログインに成功すると「cert.pem」ファイルがユーザープロファイル※にデプロイされるので、2つ目のディレクトリにコピーします。
※この記事のユーザー名は「localadmin」ですが、適宜読み替えてください。 -
トンネルの作成
トンネルを作成します。トンネル名は仮に「rdp-tunnel-01」としました。
PS C:\Cloudflared\bin> cloudflared tunnel create rdp-tunnel-01
Tunnel credentials written to C:\Users\localadmin\.cloudflared\8b79cd38-3a97-4496-b06b-f328b174e7fd.json. cloudflared chose this file based on where your origin certificate was found. Keep this file secret. To revoke these credentials, delete the tunnel.
Created tunnel rdp-tunnel-01 with id 8b79cd38-3a97-4496-b06b-f328b174e7fd
トンネル作成時に自動作成されたjson形式の認証情報ファイル (Credentials file) を2つ目のディレクトリにコピーします。
-
構成ファイルの作成
ユーザープロファイルのディレクトリ (C:\Users\localadmin\.cloudflared) に移動し、
構成ファイルをテキストエディタ等で記述しファイル名「config.yml」で保存します。ingressのserviceに、Cloudflare PoPからのイングレスルールを記述します。このWindowsホストにリモートからのRDPを到達させるルールを記述します。なお、Webサービスへのゼロトラスト接続では「hostname」が用いられますが、この記事では利用しません。tunnel: 8b79cd38-3a97-4496-b06b-f328b174e7fd credentials-file: C:\Windows\System32\config\systemprofile\.cloudflared\8b79cd38-3a97-4496-b06b-f328b174e7fd.json # Uncomment the following two lines if you are using self-signed certificates in your origin server # originRequest: # noTLSVerify: true ingress: - hostname: rdp.amalance.org service: rdp://localhost:3389 - service: http_status:404 logfile: C:\Cloudflared\cloudflared.log
以下のコマンドを実行し、構成ファイルの内容を検査します。
PS C:\Cloudflared\bin> cloudflared tunnel ingress validate
Validating rules from C:\Users\localadmin\.cloudflared\config.yml
OK
-
トンネルの起動
構成ファイルを用いてトンネルを起動してみます。
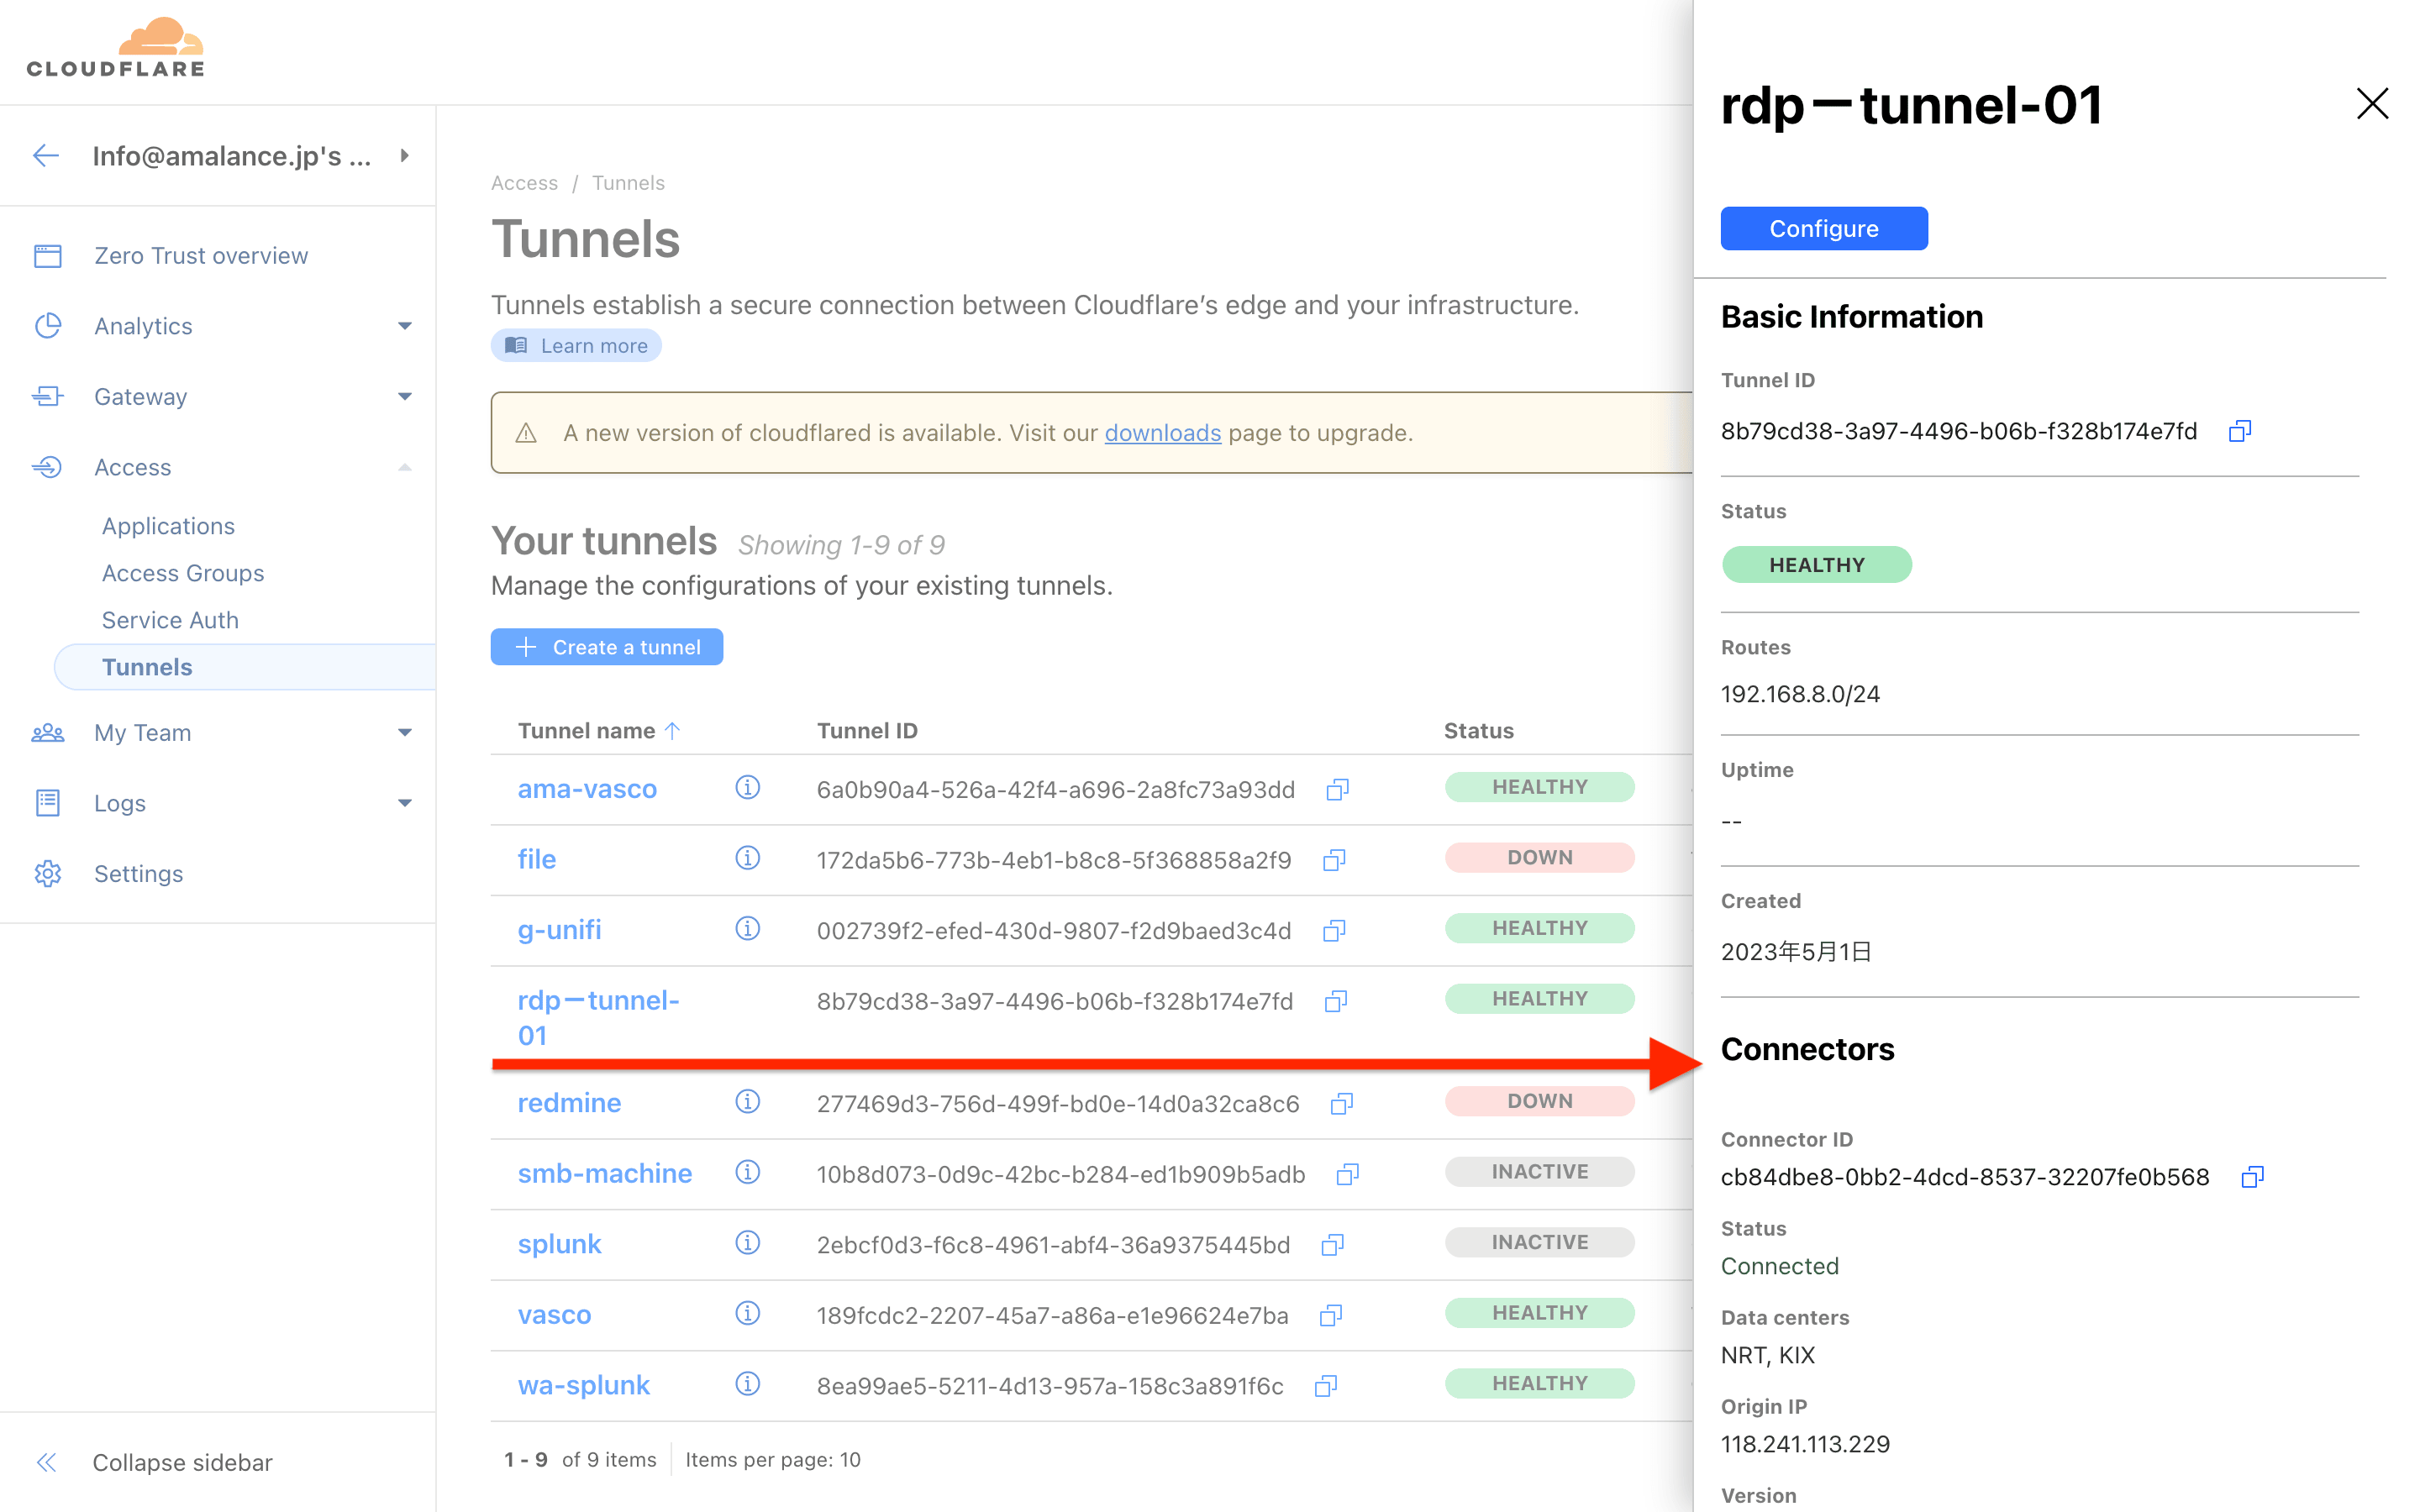
PS C:\Cloudflared\bin> cloudflared --config=C:\Users\localadmin\.cloudflared\config.yml tunnel run >> 2023-05-01T13:20:53Z INF Starting tunnel tunnelID=8b79cd38-3a97-4496-b06b-f328b174e7fd 2023-05-01T13:20:53Z INF Version 2023.4.2 2023-05-01T13:20:53Z INF GOOS: windows, GOVersion: go1.19, GoArch: amd64 2023-05-01T13:20:53Z INF Settings: map[config:C:\Users\localadmin\.cloudflared\config.yml cred-file:C:\Windows\System32\config\systemprofile\.cloudflared\8b79cd38-3a97-4496-b06b-f328b174e7fd.json credentials-file:C:\Windows\System32\config\systemprofile\.cloudflared\8b79cd38-3a97-4496-b06b-f328b174e7fd.json logfile:C:\Cloudflared\cloudflared.log] 2023-05-01T13:20:53Z INF cloudflared will not automatically update on Windows systems. 2023-05-01T13:20:53Z INF Generated Connector ID: 89aead2b-1b99-4f30-a6c6-c80e158672dc 2023-05-01T13:20:53Z INF Initial protocol quic 2023-05-01T13:20:53Z INF ICMP proxy will use 192.168.8.2 as source for IPv4 2023-05-01T13:20:53Z INF ICMP proxy will use 240d:1a:a7:e000:2dfd:4999:33a:6ff5 in zone イーサネット as source for IPv6 2023-05-01T13:20:53Z INF Starting metrics server on 127.0.0.1:49634/metrics 2023-05-01T13:20:53Z INF Registered tunnel connection connIndex=0 connection=086d8b66-101a-488d-8409-d84ac3502bfb event=0 ip=198.41.192.67 location=NRT protocol=quic 2023-05-01T13:20:54Z INF Registered tunnel connection connIndex=1 connection=f250574b-c8ad-4eff-b549-8a3c93b87a35 event=0 ip=198.41.200.193 location=KIX protocol=quic 2023-05-01T13:20:55Z INF Registered tunnel connection connIndex=2 connection=3048815d-4894-4b61-8c64-2ed602431063 event=0 ip=198.41.200.63 location=KIX protocol=quic 2023-05-01T13:20:56Z INF Registered tunnel connection connIndex=3 connection=5e47c9b4-1f71-4f29-8b2b-c18120b7a77c event=0 ip=198.41.192.7 location=NRT protocol=quicZero Trustダッシュボード「Access」「Tunnels」でもトンネルの状態を確認できます。
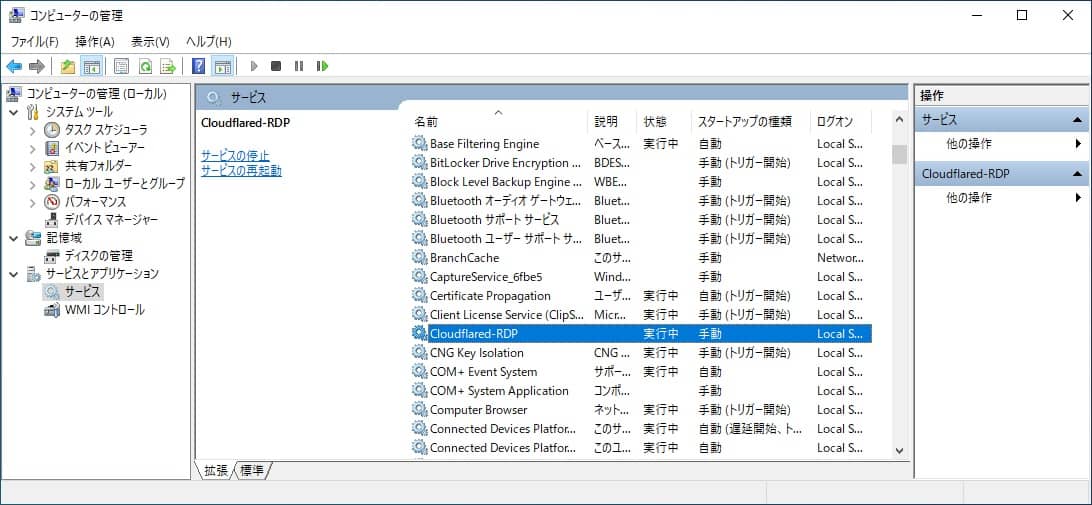
毎回CLIからトンネルを起動するのは不便なため、「Cloudflared-RDP」という名前のサービスで自動起動させるようにしてみます。
PS C:\WINDOWS\system32> sc.exe create Cloudflared-RDP binPath= "cloudflared --config C:\Users\localadmin\.cloudflared\config.yml tunnel run" [SC] CreateService SUCCESS PS C:\WINDOWS\system32> sc.exe start Cloudflared-RDP SERVICE_NAME: Cloudflared-RDP TYPE : 10 WIN32_OWN_PROCESS STATE : 2 START_PENDING (NOT_STOPPABLE, NOT_PAUSABLE, IGNORES_SHUTDOWN) WIN32_EXIT_CODE : 0 (0x0) SERVICE_EXIT_CODE : 0 (0x0) CHECKPOINT : 0x0 WAIT_HINT : 0x7d0 PID : 11688 FLAGS : -
WARPを用いたRDP接続
リモートからCloudflareトンネルを経由してWindowsホストにRDPで接続します。なお、リモートクライアントはCloudflareのPoPにクライアントアプリ「WARP」で直接トンネルを張ります。WARPの導入方法はこちらの記事を参照してください。
なお、RDPサーバーとなるWindowsホストは離れた拠点のローカルネットワークにあり、また、WARPはローカルネットワークを迂回する初期設定となっているため、本ユースケース固有の事前準備が必要です。
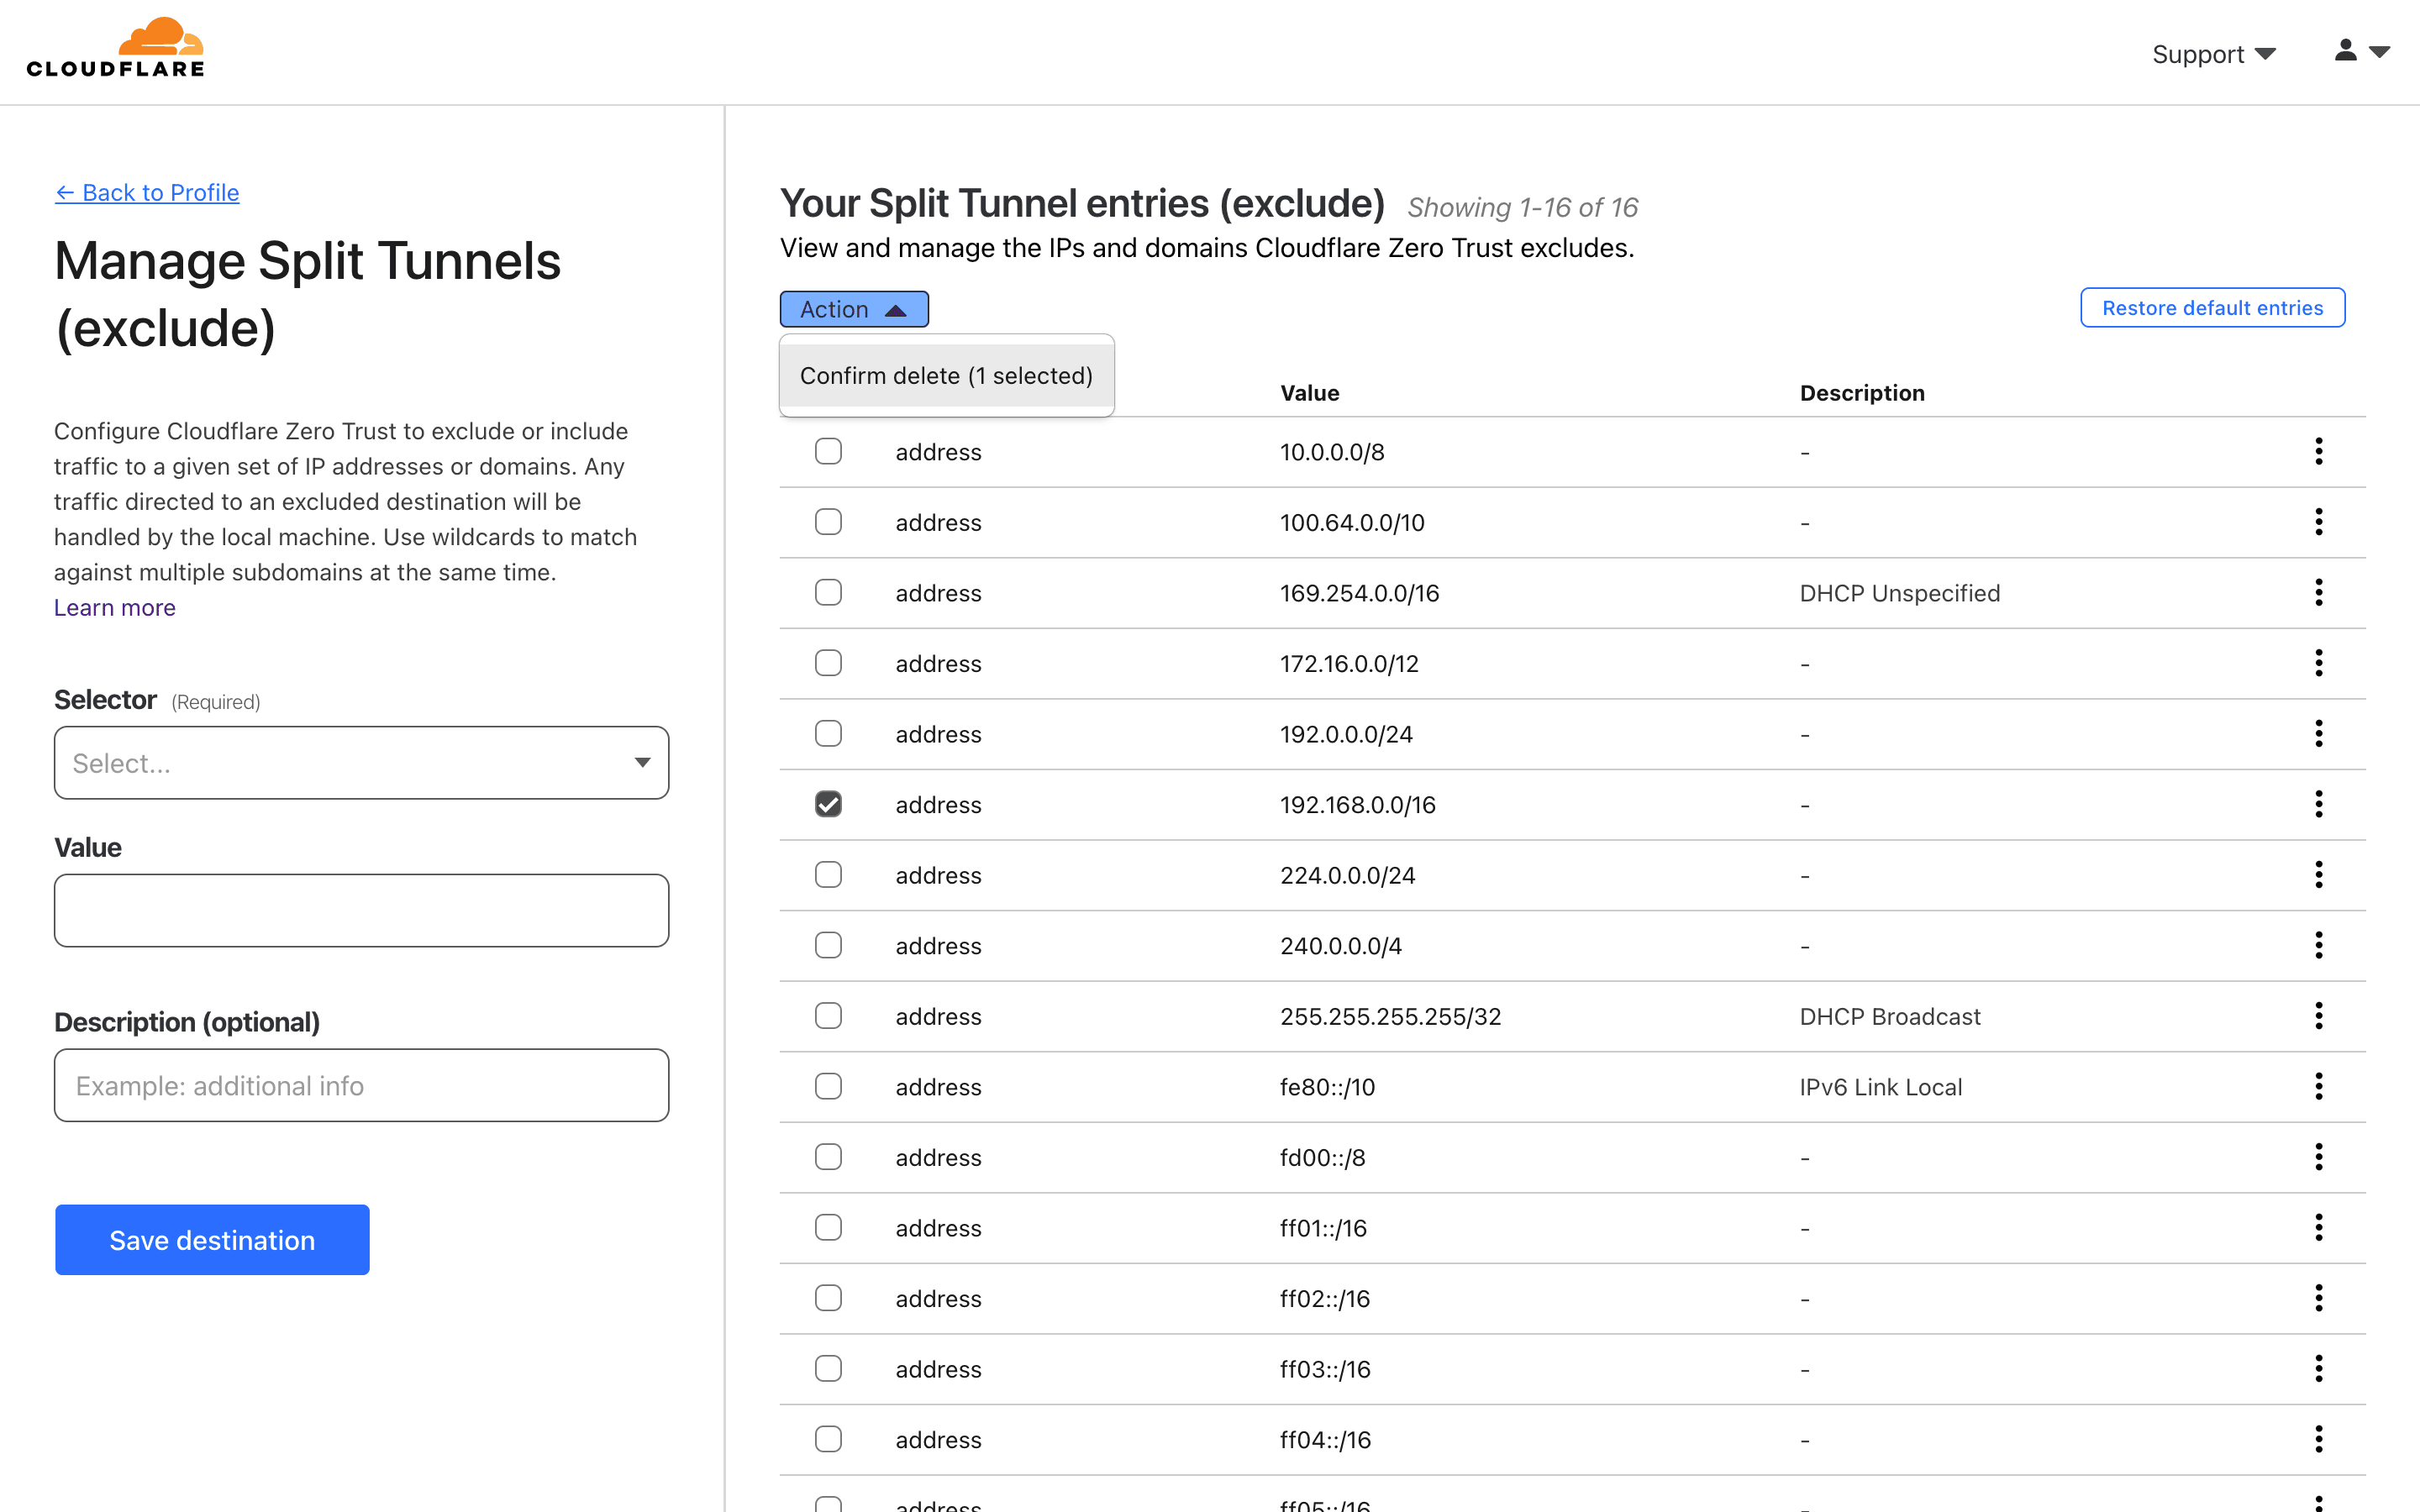
組織のZero Trustダッシュボード「Settings」「WARP Client」「Profile」「Split Tunnels」から、Windowsホストが存在するネットワーク「192.168.0.0/16」を除外ルール「Exclude IPs and domains」から削除します。
WARPにはこの変更が即座に反映され、WARPユーザーは「Preferences」「Advanced」「Split Tunnel」でその内容を確認できます。
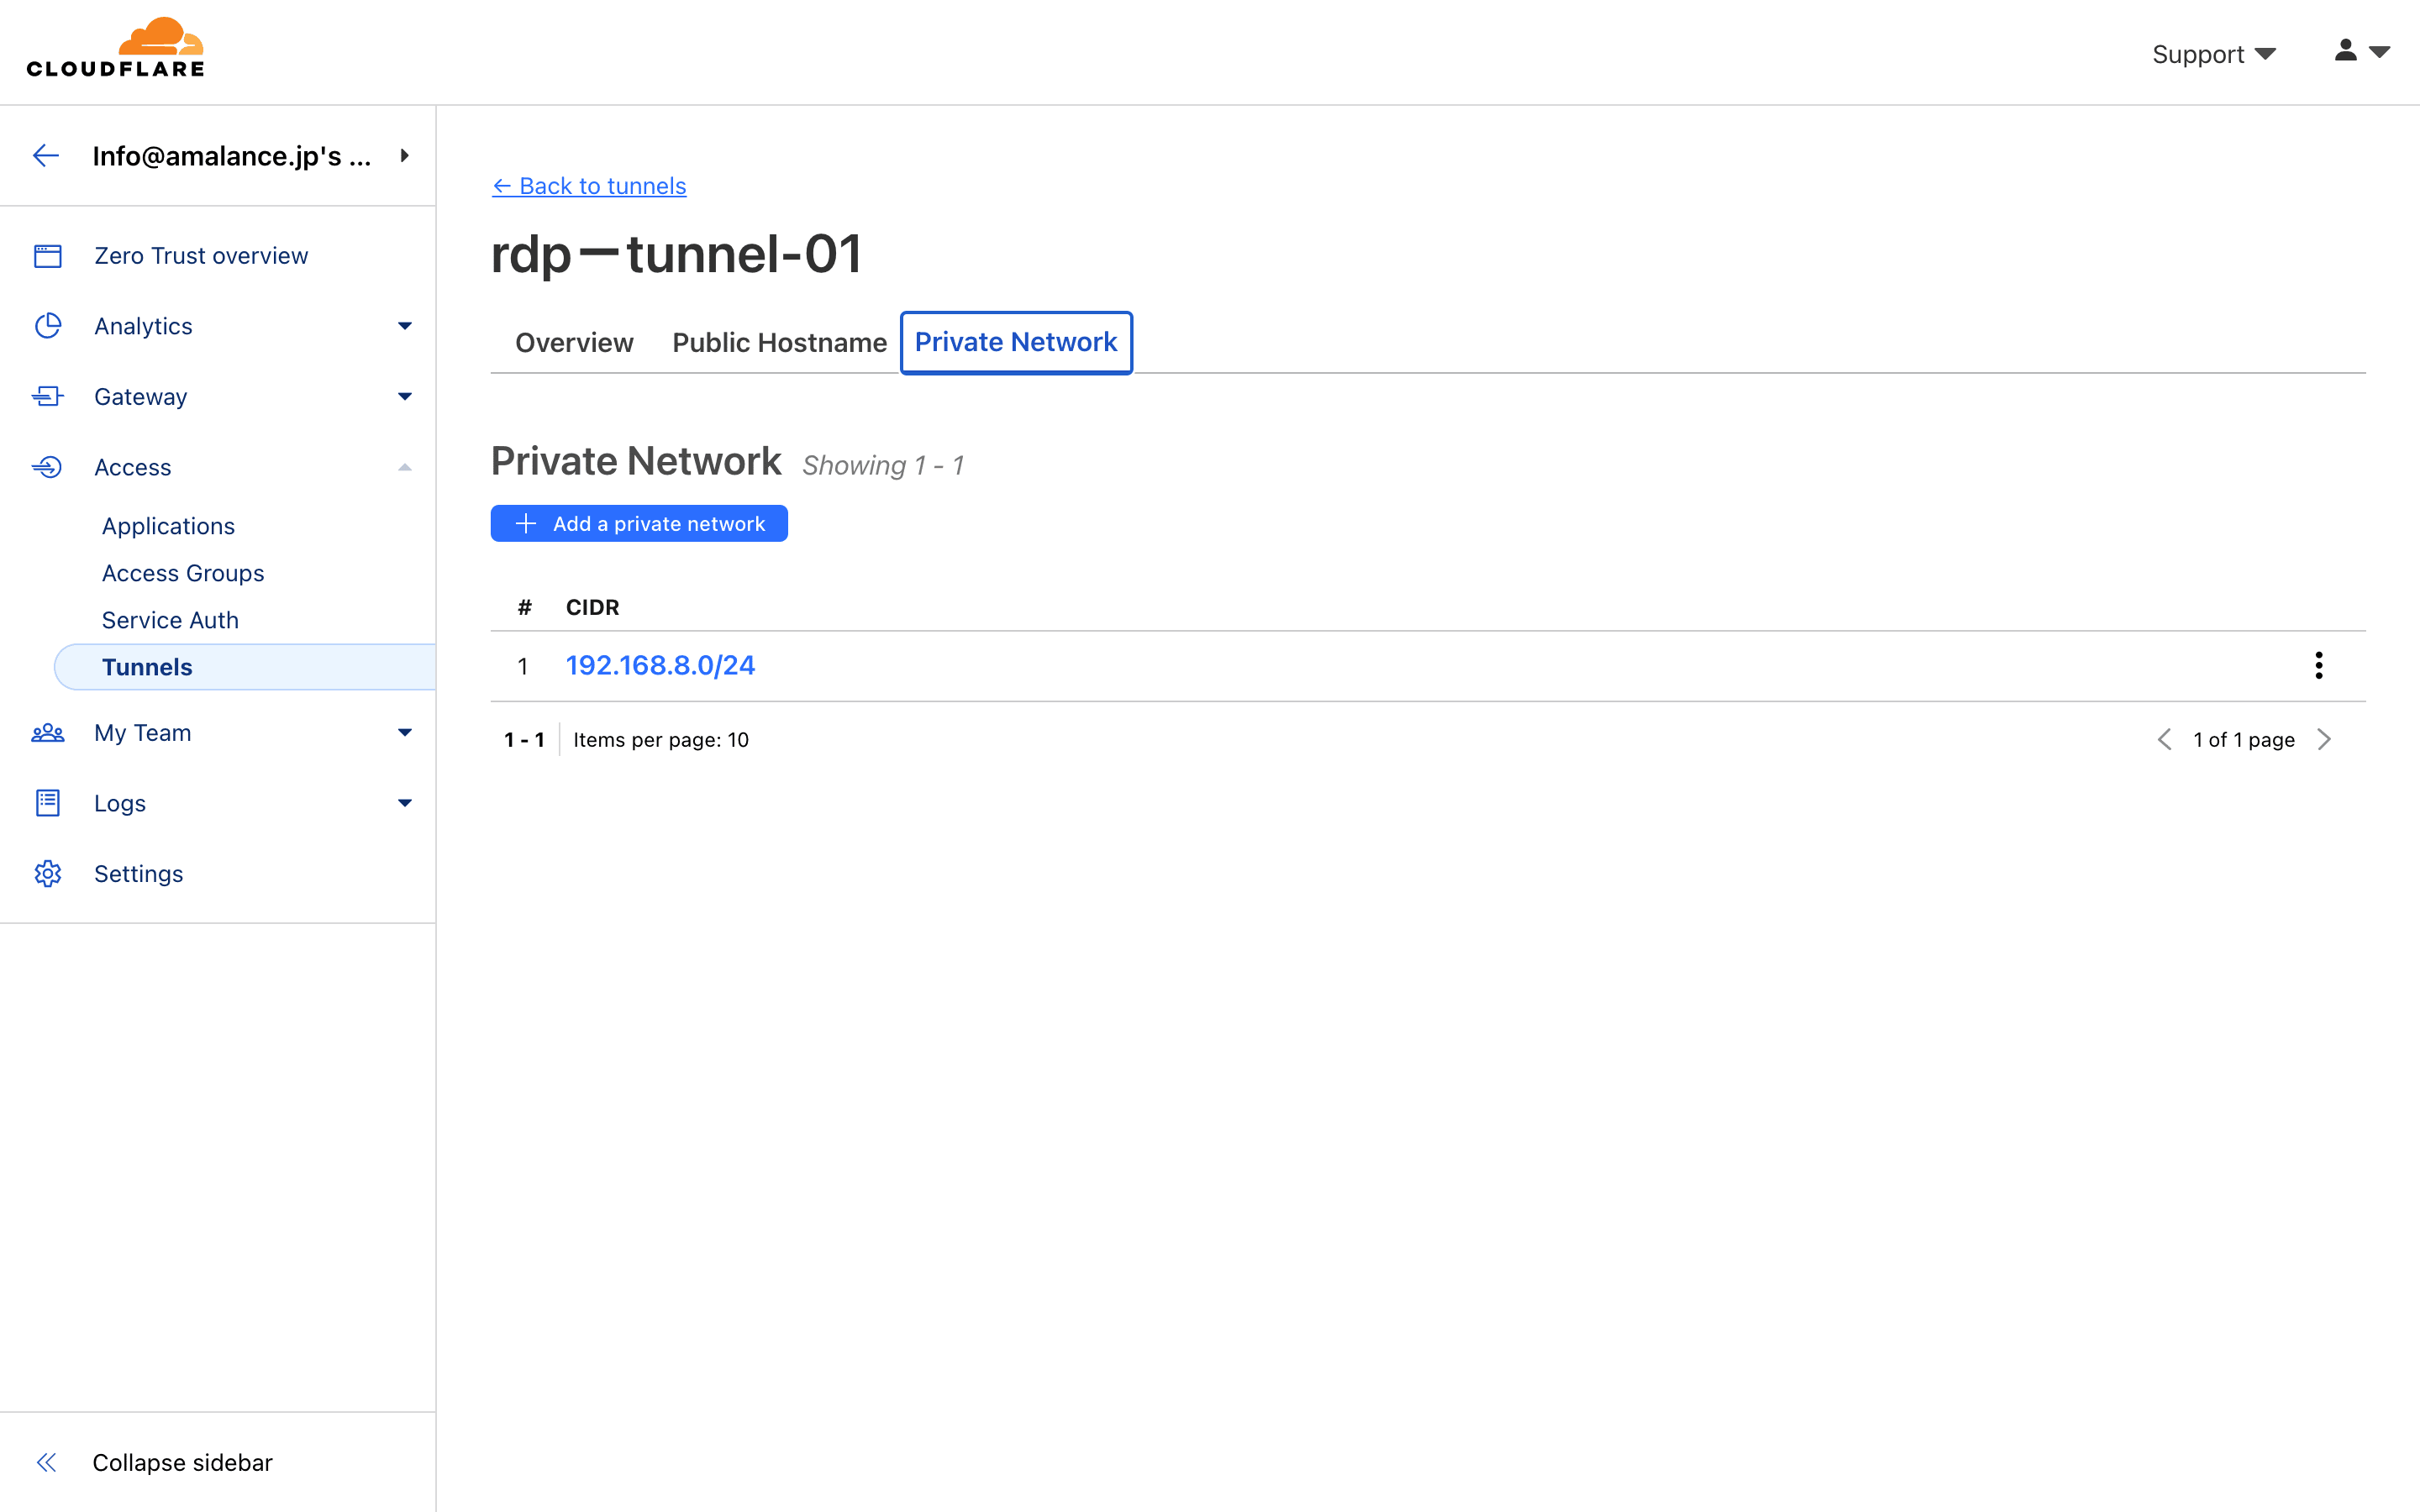
「Access」「Tunnels」からトンネル名「rdp-tunnel-01」をクリックし、「Private Network」に、Windowsホストが所属するネットワーク「192.168.8.0/24」を設定します。
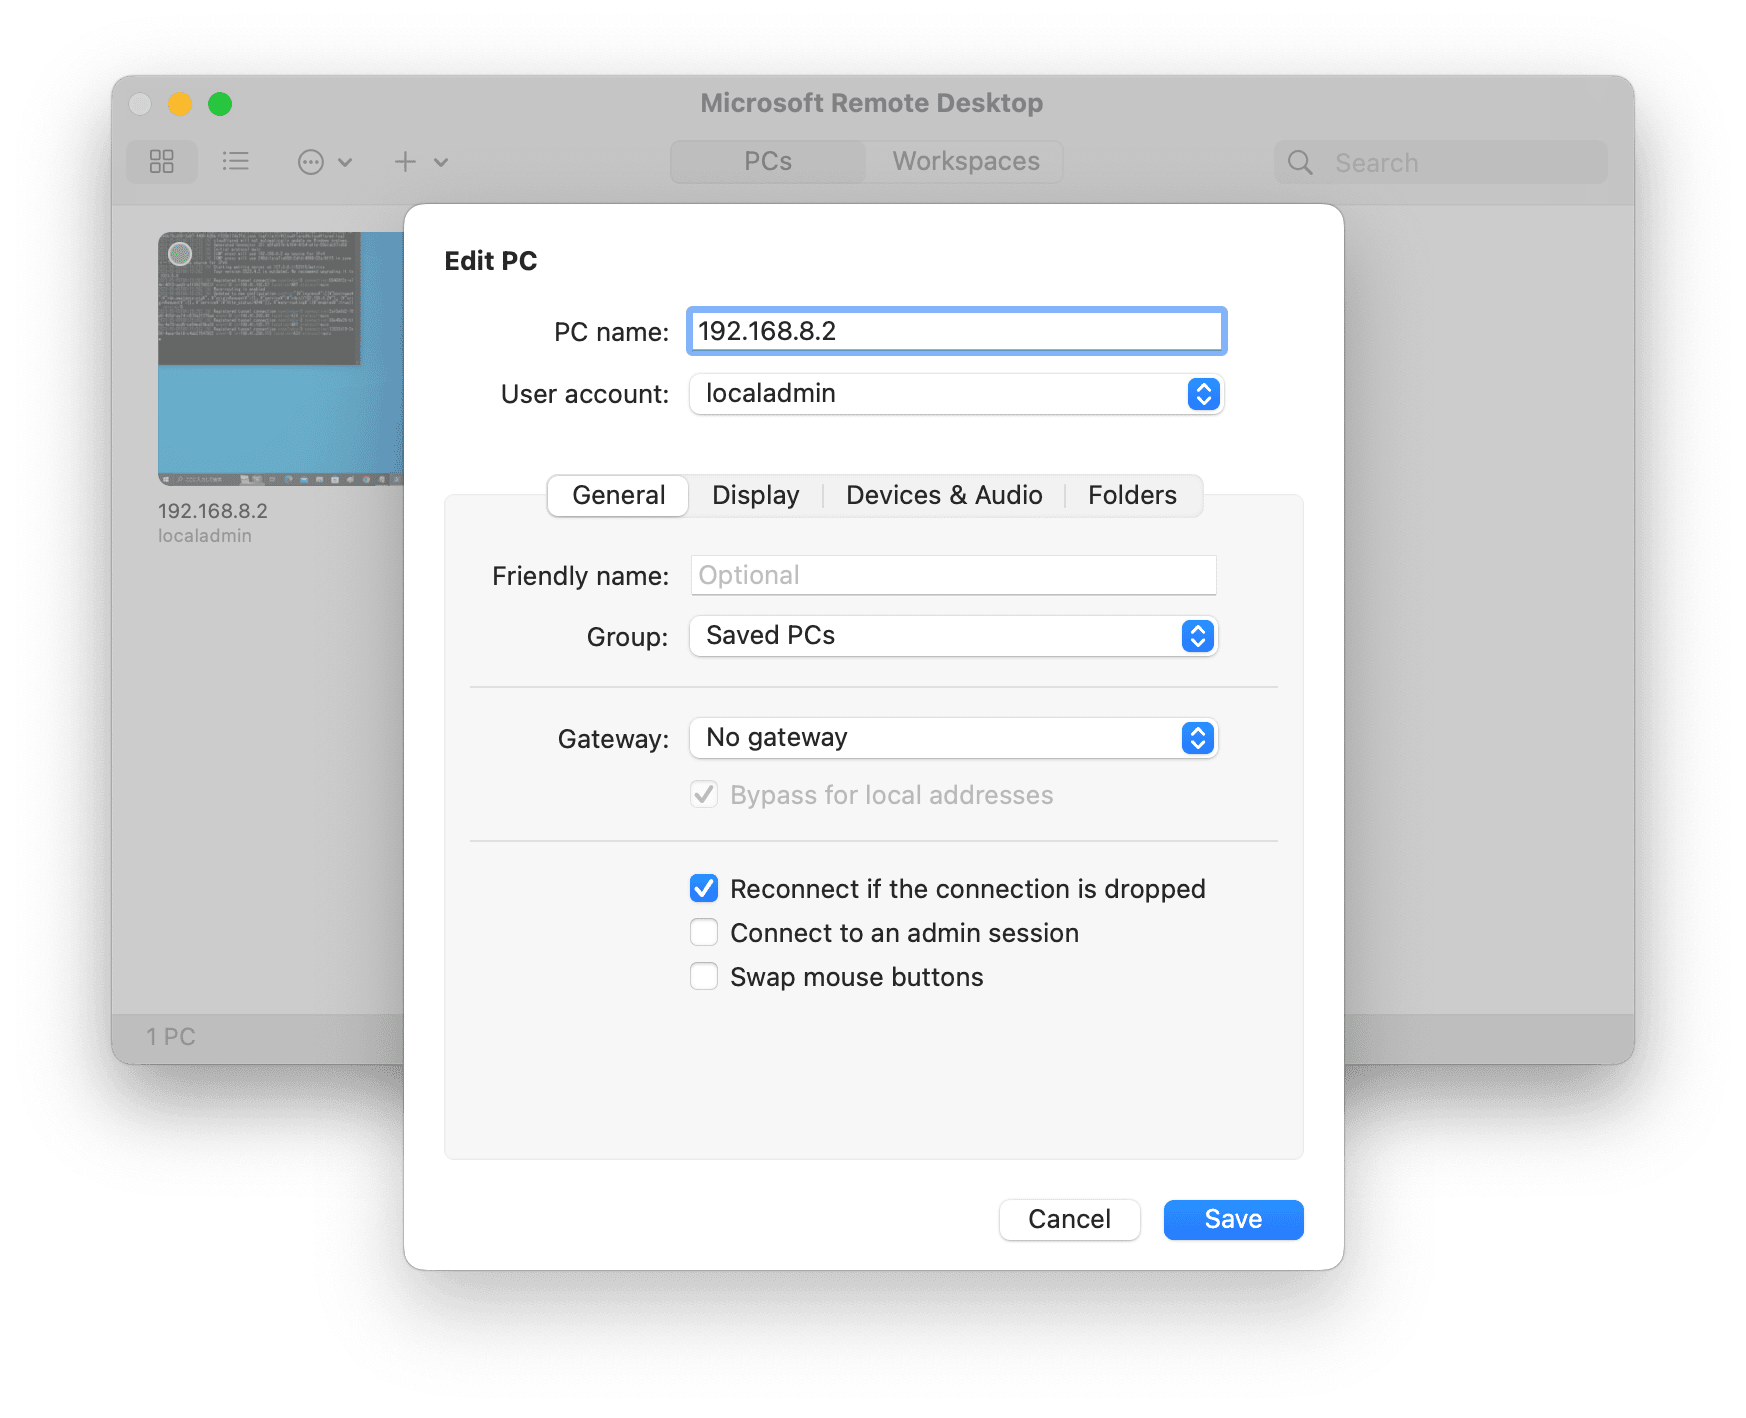
RDPクライントとして今回はMacbook Airを利用します。また、RDPクライアントアプリ「Microsoft Remote Desktop」を利用します。
MS Remote Desktopに接続先の「PC」を登録します。「PC Name」に接続先のWindows10 ProのローカルIPアドレス「192.168.8.2」を設定し保存します。
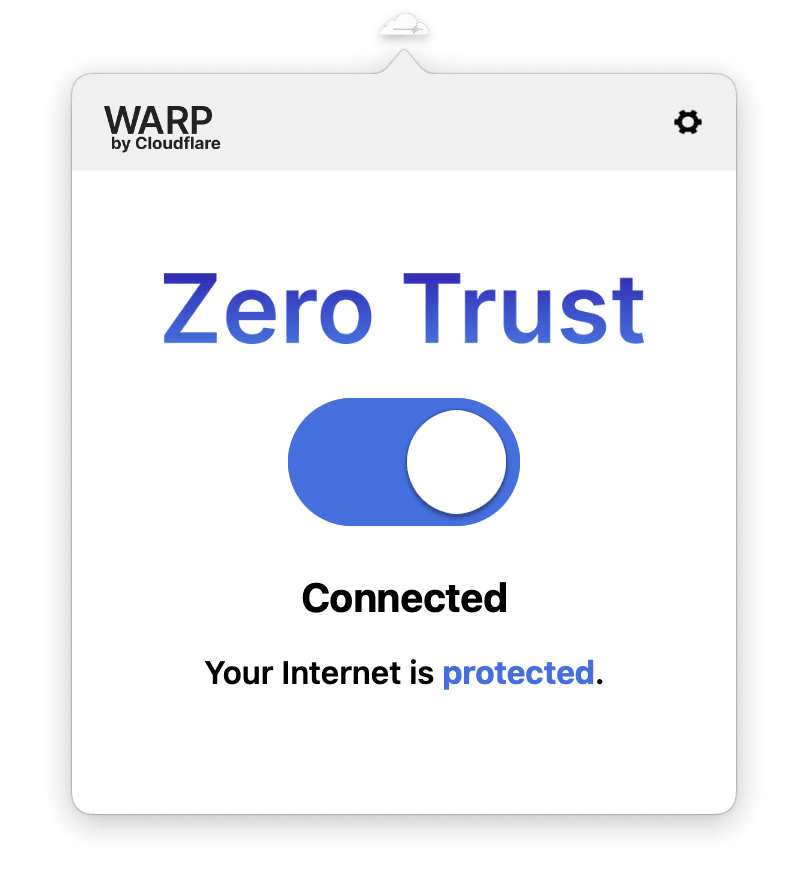
次に、WARPの「Zero Trust」スイッチをONにし、組織のPoPにトンネルを張ります。
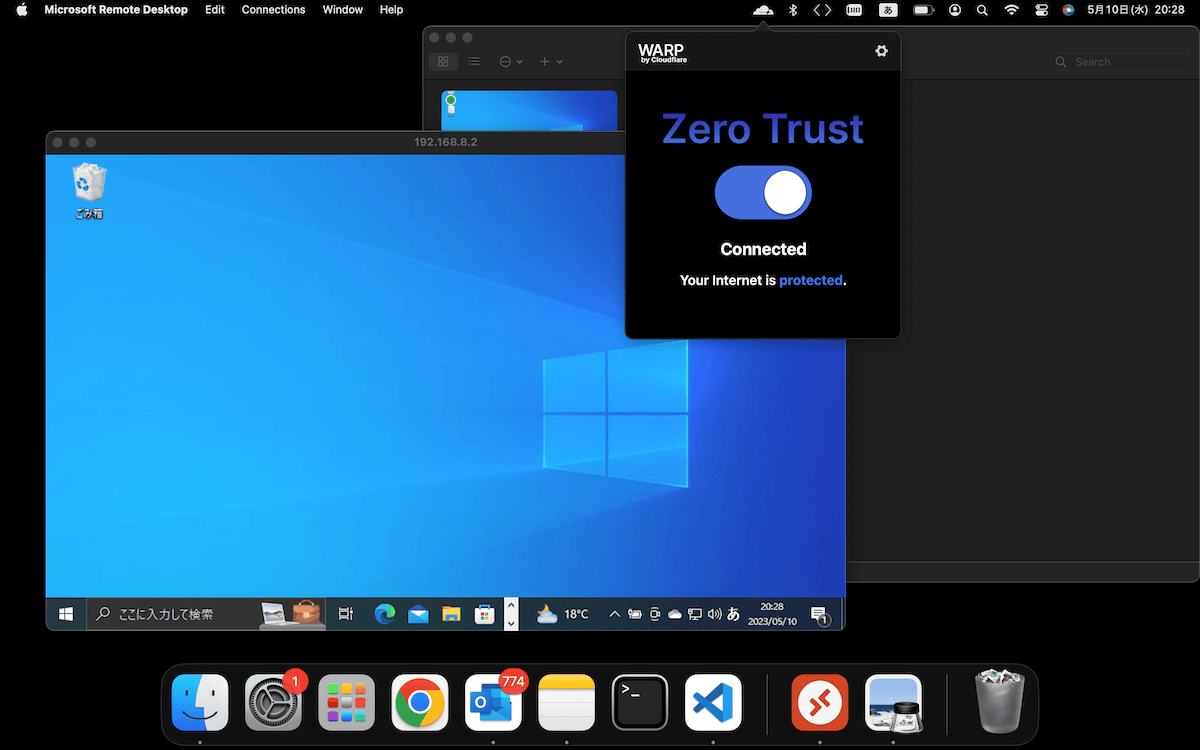
最後に、MS Remote Desktopで作成済みのプロファイルで「Connect」すると、リモートにあるWindows10 Proにログインできました。
当然ながら、WARPの「Zero Trust」スイッチをOFFにすると、RDPセッションが切断されます。